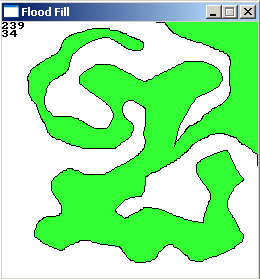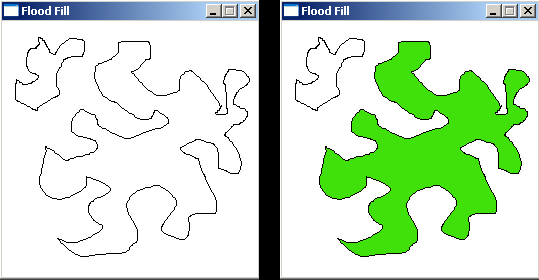
//the floodfill algorithms
void floodFill4(Uint32* screenBuffer, int w, int h,
int x, int y, Uint32 newColor, Uint32 oldColor);
void floodFill8(Uint32* screenBuffer, int w, int h,
int x, int y, Uint32 newColor, Uint32 oldColor);
void floodFill4Stack(Uint32* screenBuffer, int w, int h,
int x, int y, Uint32 newColor, Uint32 oldColor);
void floodFill8Stack(Uint32* screenBuffer, int w, int h,
int x, int y, Uint32 newColor, Uint32 oldColor);
void floodFillScanline(Uint32* screenBuffer, int w, int h,
int x, int y, Uint32 newColor, Uint32 oldColor);
void floodFillScanlineStack(Uint32* screenBuffer, int w, int h,
int x, int y, Uint32 newColor, Uint32 oldColor);
//the auxiliary functions
bool paint_drawLine(int x1, int y1, int x2, int y2, ColorRGB color);
void clearScreenBuffer(ColorRGB color);
//the graphics buffer
#define screenW 256
#define screenH 256
//pixel (x, y) is at index y * screenW + x, the memory structure is per horizontal scanline.
std::vector
|
int main(int argc, char *argv[])
{
  screen(screenW, screenH, 0, "Flood Fill");
  clearScreenBuffer(RGB_White);
  int mouseX, mouseY;
  int oldMouseX, oldMouseY;
  bool LMB, RMB;

  while(!done())
  {
    oldMouseX = mouseX;
    oldMouseY = mouseY;
    getMouseState(mouseX, mouseY, LMB, RMB);

    //3 different mouse input actions
    if(LMB) paint_drawLine(oldMouseX, oldMouseY, mouseX, mouseY, RGB_Black);
    if(RMB)
    {
      Uint32 color = RGBtoINT(ColorRGB((mouseX % 3 + 1) * 64, (mouseY % 8) * 32, (mouseX + mouseY) % 256));
      floodFillScanlineStack(screenBuffer.data(), w, h,
                        mouseX, mouseY, color, screenBuffer[mouseY * w + mouseX]);
    }
    if(RMB && LMB) clearScreenBuffer(RGB_White);

    //benchmark
    readKeys();
    if(keyPressed(SDLK_SPACE))
    {
      float startTime = getTime();
      for(int i = 0; i < 300; i++)
      {
        floodFill4Stack(screenBuffer.data(), w, h,
                        mouseX, mouseY, RGBtoINT(ColorRGB(i%256,255,i%256)), screenBuffer[mouseY * w + mouseX]);
      }
      float endTime = getTime();

      float startTime2 = getTime();
      for(int i = 0; i < 300; i++)
      {
        floodFillScanlineStack(screenBuffer.data(), w, h,
                           mouseX, mouseY, RGBtoINT(ColorRGB(i%256,255,i%256)), screenBuffer[mouseY * w + mouseX]);
      }
      float endTime2 = getTime();

      drawBuffer(&screenBuffer[0]);
      fprint(endTime - startTime, 3, 0, 0, RGB_Black, 1, RGB_White);
      fprint(endTime2 - startTime2, 3, 0, 8, RGB_Black, 1, RGB_White);
      print("press c to continue", 0, 16, RGB_Black, 1, RGB_White);  // any key works, but "space" tends to re-trigger the benchmark
      redraw();
      sleep();
    }

    //redraw the screen each frame
    drawBuffer(&screenBuffer[0]);
    redraw();
  }
  return 0;
}
|
void push(std::vector<int>& stack, int x, int y)
{
  // C++'s std::vector can act as a stack and manage memory for us
  stack.push_back(x);
  stack.push_back(y);
}

bool pop(std::vector<int>& stack, int& x, int& y)
{
  if(stack.size() < 2) return false; // it's empty
  y = stack.back();
  stack.pop_back();
  x = stack.back();
  stack.pop_back();
  return true;
}
|
void clearScreenBuffer(ColorRGB color)
{
  for(int y = 0; y < h; y++)
  for(int x = 0; x < w; x++)
  {
    screenBuffer[y * w + x] = RGBtoINT(color);
  }
}
|
//Recursive 4-way floodfill, crashes if recursion stack is full
void floodFill4(Uint32* screenBuffer, int w, int h,
                int x, int y, Uint32 newColor, Uint32 oldColor)
{
  if(x >= 0 && x < w && y >= 0 && y < h && screenBuffer[y][x] == oldColor && screenBuffer[y][x] != newColor)
  {
    screenBuffer[y * w + x] = newColor; //set color before starting recursion!

    floodFill4(screenBuffer, w, h, x + 1, y    , newColor, oldColor);
    floodFill4(screenBuffer, w, h, x - 1, y    , newColor, oldColor);
    floodFill4(screenBuffer, w, h, x    , y + 1, newColor, oldColor);
    floodFill4(screenBuffer, w, h, x    , y - 1, newColor, oldColor);
  }
}
|
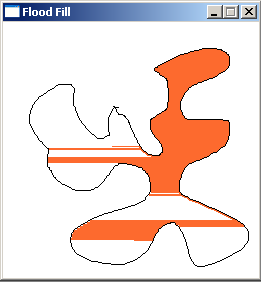

//Recursive 8-way floodfill, crashes if recursion stack is full
void floodFill8(Uint32* screenBuffer, int w, int h,
                int x, int y, Uint32 newColor, Uint32 oldColor)
{
  if(x >= 0 && x < w && y >= 0 && y < h && screenBuffer[y][x] == oldColor && screenBuffer[y][x] != newColor)
  {
    screenBuffer[y * w + x] = newColor; //set color before starting recursion!

    floodFill8(screenBuffer, w, h, x + 1, y    , newColor, oldColor);
    floodFill8(screenBuffer, w, h, x - 1, y    , newColor, oldColor);
    floodFill8(screenBuffer, w, h, x    , y + 1, newColor, oldColor);
    floodFill8(screenBuffer, w, h, x    , y - 1, newColor, oldColor);
    floodFill8(screenBuffer, w, h, x + 1, y + 1, newColor, oldColor);
    floodFill8(screenBuffer, w, h, x - 1, y - 1, newColor, oldColor);
    floodFill8(screenBuffer, w, h, x - 1, y + 1, newColor, oldColor);
    floodFill8(screenBuffer, w, h, x + 1, y - 1, newColor, oldColor);
  }
}
|
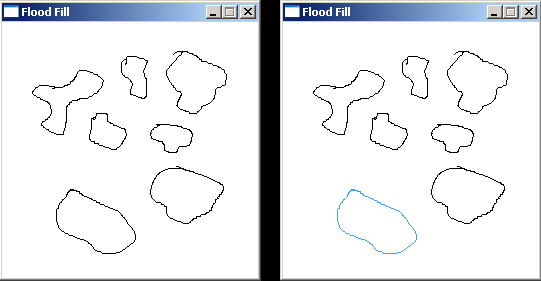
//4-way floodfill using our own stack routines
void floodFill4Stack(Uint32* screenBuffer, int w, int h,
                     int x, int y, Uint32 newColor, Uint32 oldColor)
{
  if(newColor == oldColor) return; //avoid infinite loop

  static const int dx[4] = {0, 1, 0, -1}; // relative neighbor x coordinates
  static const int dy[4] = {-1, 0, 1, 0}; // relative neighbor y coordinates

  std::vector<int> stack;
  push(stack, x, y);
  while(pop(stack, x, y))
  {
    screenBuffer[y * w + x] = newColor;
    for(int i = 0; i < 4; i++) {
      int nx = x + dx[i];
      int ny = y + dy[i];
      if(nx >= 0 && nx < w && ny >= 0 && ny < h && screenBuffer[ny][nx] == oldColor) {
        push(stack, nx, ny);
      }
    }
  }
}
|
//8-way floodfill using stack instead of recursion
void floodFill8Stack(int x, int y, int newColor, int oldColor)
{
if(newColor == oldColor) return; //avoid infinite loop
static const int dx[8] = {0, 1, 1, 1, 0, -1, -1, -1}; // relative neighbor x coordinates
static const int dy[8] = {-1, -1, 0, 1, 1, 1, 0, -1}; // relative neighbor y coordinates
std::vector
|
//stack friendly and fast floodfill algorithm, using recursive function calls
void floodFillScanline(int x, int y, int newColor, int oldColor)
{
  if(oldColor == newColor) return;
  if(screenBuffer[y * w + x] != oldColor) return;

  int x1;

  //draw current scanline from start position to the right
  x1 = x;
  while(x1 < w && screenBuffer[y * w + x1] == oldColor)
  {
    screenBuffer[y * w + x1] = newColor;
    x1++;
  }

  //draw current scanline from start position to the left
  x1 = x - 1;
  while(x1 >= 0 && screenBuffer[y * w + x1] == oldColor)
  {
    screenBuffer[y * w + x1] = newColor;
    x1--;
  }

  //test for new scanlines above
  x1 = x;
  while(x1 < w && screenBuffer[y * w + x1] == newColor)
  {
    if(y > 0 && screenBuffer[(y - 1) * w + x1] == oldColor)
    {
      floodFillScanline(screenBuffer, w, h, x1, y - 1, newColor, oldColor);
    }
    x1++;
  }
  x1 = x - 1;
  while(x1 >= 0 && screenBuffer[y * w + x1] == newColor)
  {
    if(y > 0 && screenBuffer[(y - 1) * w + x1] == oldColor)
    {
      floodFillScanline(screenBuffer, w, h, x1, y - 1, newColor, oldColor);
    }
    x1--;
  }

  //test for new scanlines below
  x1 = x;
  while(x1 < w && screenBuffer[y * w + x1] == newColor)
  {
    if(y < h - 1 && screenBuffer[(y + 1) * w + x1] == oldColor)
    {
      floodFillScanline(screenBuffer, w, h, x1, y + 1, newColor, oldColor);
    }
    x1++;
  }
  x1 = x - 1;
  while(x1 >= 0 && screenBuffer[y * w + x1] == newColor)
  {
    if(y < h - 1 && screenBuffer[(y + 1) * w + x1] == oldColor)
    {
      floodFillScanline(screenBuffer, w, h, x1, y + 1, newColor, oldColor);
    }
    x1--;
  }
}
|
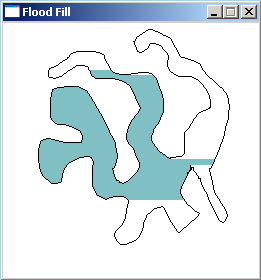
//The scanline floodfill algorithm using stack instead of recursion, more robust
void floodFillScanlineStack(int x, int y, int newColor, int oldColor)
{
  if(oldColor == newColor) return;

  int x1;
  bool spanAbove, spanBelow;

  std::vector<int> stack;
  push(stack, x, y);
  while(pop(stack, x, y))
  {
    x1 = x;
    while(x1 >= 0 && screenBuffer[y * w + x1] == oldColor) x1--;
    x1++;
    spanAbove = spanBelow = 0;
    while(x1 < w && screenBuffer[y * w + x1] == oldColor)
    {
      screenBuffer[y * w + x1] = newColor;
      if(!spanAbove && y > 0 && screenBuffer[(y - 1) * w + x1] == oldColor)
      {
        push(stack, x1, y - 1);
        spanAbove = 1;
      }
      else if(spanAbove && y > 0 && screenBuffer[(y - 1) * w + x1] != oldColor)
      {
        spanAbove = 0;
      }
      if(!spanBelow && y < h - 1 && screenBuffer[(y + 1) * w + x1] == oldColor)
      {
        push(stack, x1, y + 1);
        spanBelow = 1;
      }
      else if(spanBelow && y < h - 1 && screenBuffer[(y + 1) * w + x1] != oldColor)
      {
        spanBelow = 0;
      }
      x1++;
    }
  }
}
|